












The box has arrived. You've done the research, picked your chair, and now it's sitting in the middle of the room — all promise and no seat. Assembling a gaming chair has a reputation for being frustrating, but that reputation is mostly earned by bad instructions and easily avoided mistakes. Done right, the whole process takes 20 to 45 minutes and leaves you with a rock-solid, ergonomically dialed-in setup that will carry you through years of long sessions.
This guide walks you through every phase of gaming chair assembly — from clearing your workspace and laying out components, to the step-by-step build. For model-specific instructions, videos, and downloadable manuals, check our official Blacklyte installation guide. Whether you're putting together a Blacklyte Kraken Pro, the Athena Pro, the Athena, or another premium gaming chair, these fundamentals apply universally. The steps are the same — it's the quality of the parts you're working with that changes the long-term experience.
What You'll Need Before You Start
Most gaming chairs ship with every tool required for assembly — typically one or two Allen wrenches (hex keys) and a bag of bolts sorted by size. Before you do anything else, check that hardware bag. A missing M8 bolt discovered at the final step is far more frustrating than catching it at the start. Beyond the included hardware, a few extras will make the process faster and more comfortable:
- Allen wrenches (included): The primary tool for every bolted connection on the chair.
- Phillips-head screwdriver: Occasionally needed for plastic trim or accessory attachments.
- Rubber mallet or firm palm: Useful for seating casters firmly into the base without damaging finishes.
- A second person (optional but helpful): The backrest-to-seat step is significantly easier with someone to hold parts steady.
- A soft surface (the flattened shipping box works perfectly): Protects your floor and the chair's upholstery during ground-level assembly work.
With your tools gathered and your hardware counted, you're ready to build.
Set Up Your Workspace the Right Way
This is the step most guides skip, and it's where most of the frustration actually begins. Assembly on a cluttered floor means screws roll under furniture, components get scuffed, and you spend more time searching than building. Clear a space of at least 2 metres by 2 metres — enough room to lay every component flat without parts overlapping. If you're on hardwood or tile, put down the flattened cardboard from the shipping box. It protects both your floor and the leatherette or fabric upholstery of your chair from scratches during assembly.
Once the space is clear, unbox the chair completely before touching anything. Lay every component out in front of you: the five-star base, five casters, the hydraulic gas piston with its telescopic cover, the seat pan, the backrest, the armrests, the tilt mechanism plate, and the hardware bag. Open the instruction manual and cross-reference each part against the illustrated checklist. Factories are thorough, but omissions happen — and it's far better to raise a warranty claim now than after you're halfway through assembly. Blacklyte chairs come backed by a warranty extendable up to five years on chairs, so if something is missing or damaged, contact the team before proceeding.
Know Your Parts: A Quick Orientation
Gaming chairs have more components than a standard office chair, and understanding what each part does before assembly saves time and prevents orientation errors. Here's a plain-language breakdown of the main components:
- Five-star base: The wide, wheeled platform the entire chair rests on. All three chairs use an aluminum alloy base for a lighter, more rigid foundation.
- Casters (wheels): Five dual-wheel casters that press-fit into the ends of the base arms.
- Hydraulic gas piston: The height-adjustment cylinder that slots into the centre of the base. Blacklyte chairs use a Class 4 hydraulic gas piston — a commercial-grade specification rated for tens of thousands of actuations.
- Tilt mechanism: A metal plate that bolts to the underside of the seat pan and connects the seat to the gas piston. This is the single most orientation-sensitive component in the build.
- Seat pan: The padded seat cushion. Blacklyte's Athena Pro uses a memory foam over contour-foam core seat (infused with bamboo charcoal and silver ions); the Athena and Kraken Pro use high-density contour foam seats.
- Backrest: The tall padded back panel that bolts to the seat via side brackets or a central bar mechanism.
- Armrests: All Blacklyte chairs ship with 4D armrests across the full lineup — adjustable in height, width, pivot, and fore-aft position.
- Lumbar and headrest pillows: Attachment-style cushions or, on the Athena Pro, a built-in 4-way adjustable lumbar system integrated into the backrest.
Step-by-Step Assembly Guide
Work through these steps in order. Each phase builds on the last, and jumping ahead — particularly lowering the seat onto the base before the backrest is fully secured — creates rework and frustration.
1. Install the Casters
Flip the five-star base upside down so the five socket openings at the end of each arm face upward. Take one caster, line up the metal stem with a socket, and push down firmly until you hear or feel a solid click. Repeat for all five wheels. Some casters require a firm palm press — this is normal, and the resistance is what keeps them locked in place during use. Once all five are seated, flip the base right-side up. It should sit completely flat and stable on all wheels before you continue.
2. Seat the Hydraulic Gas Piston
Slide the plastic telescopic cover over the hydraulic gas piston if it isn't already attached. Insert the wider base end of the piston into the central opening of the five-star base — it simply rests in the socket under gravity at this stage and does not click or lock. That's intentional. The final seating of the piston happens when the full weight of the assembled chair and your body presses down on it. Set this base assembly aside and move to building the upper chair body on the ground.
3. Attach the Tilt Mechanism to the Seat
Flip the seat pan upside down on your soft surface (the cardboard box is ideal). Locate the tilt mechanism — the flat metal plate with the lever(s) and a central socket hole. Before you bolt it on, look for a stamped arrow or sticker on the mechanism that reads FRONT. This marker must align with the front edge of the seat. Installing the tilt mechanism backwards is one of the most common assembly errors, and it causes the chair to feel unbalanced or to tip forward under load. Align the bolt holes, hand-thread all four bolts first to make sure nothing is cross-threaded, then tighten in a cross pattern — front-left, back-right, front-right, back-left — so the plate seats evenly. Do not fully torque any single bolt before the others are started.
4. Secure the Backrest
With the seat pan still upside down (or set upright if your model's backrest attaches from the rear), align the backrest brackets with the side mounting points on the seat. This is the step that benefits most from a second pair of hands — one person holds the backrest vertical and steady while the other guides the bolts in. If you're building solo, prop the backrest against a wall or use the shipping box to keep it upright while you work. Hand-thread all bolts before tightening any of them. Once everything is started, tighten progressively — snug all bolts to about 50% torque, then go around again to full tightness. This prevents the bracket from pulling slightly to one side, which is what causes a visibly crooked backrest.
5. Mount the Armrests
Armrests attach to the underside of the seat pan via bolts through slotted mounting plates. Before mounting, check for L and R markings — installing armrests on the wrong sides is a classic first-build mistake, and on 4D armrests the pivot and fore-aft adjustment directions will be mirrored incorrectly if swapped. If you want your armrests at a specific width setting (not fully inward or outward), measure the gap between them with a tape measure and mark the position on both sides before tightening. Hand-thread all bolts first, confirm symmetry, then tighten fully.
6. Lower the Seat onto the Base
This is the moment the chair becomes a chair. Lift the assembled upper body — seat, backrest, and armrests — and align the socket at the centre of the tilt mechanism directly above the top of the hydraulic gas piston. Since you can't see the connection point while holding the chair, use the base arms as a visual guide: centre the seat over the wheelbase and lower it straight down. Once the socket slides over the piston top, sit in the chair immediately. Your body weight is the final press that locks the friction-fit connection. Reach under the right side and test the height lever — the chair should rise when you lift your weight off the seat, and lower smoothly when you sit back down.
7. Attach Pillows and Accessories
The final step depends on your specific model. For the Kraken Pro, the floating lumbar support is built into the backrest and adjusts front-to-back for depth — no separate attachment needed. For the Athena Pro, the 4-way adjustable lumbar (up/down and front/back) is fully integrated. For the Athena, position the external lumbar pillow at the natural curve of your lower back. Every Blacklyte chair ships with a magnetic head pillow — snap it onto the top of the backrest at a height where it supports the base of your skull, not the middle of your neck. The magnetic mount lets you reposition it instantly and holds it in place without slipping. Give every bolt a final check-torque before your first serious session.
Post-Assembly: Dialing In Your Ergonomics
Assembly gets your chair standing. Ergonomic setup is what makes it work for your body. A fully built chair with default settings is not an ergonomic chair — it's just a chair. Take five minutes after assembly to dial in these core adjustments before your first session:
- Seat height: Adjust so your feet rest flat on the floor with your knees at approximately 90 degrees. Your thighs should be roughly parallel to the ground. If you have a hard floor, consider a chair mat to ensure smooth caster movement.
- Backrest recline: All Blacklyte chairs offer a recline range of 90° to 149°. Start at 100° to 110° for desk work — a slight rearward lean reduces spinal compression compared to a rigid upright position. Use the recline lever to lock your preferred angle.
- Lumbar support: Position your lumbar support at the inward curve of your lower back, roughly level with the top of your pelvis. On the Athena Pro, use the 4-way adjustment to dial in both height and depth. On the Kraken Pro, adjust the floating lumbar depth using the fine-adjust knob at the back of the backrest.
- 4D Armrests: Raise or lower until your shoulders are relaxed and your elbows form roughly a 90° angle when your hands rest on your desk or keyboard. Use the fore-aft and pivot adjustments to eliminate any lateral reach or wrist angle strain. All Blacklyte chairs include 4D armrests across the full lineup, so every dimension is adjustable.
- Tilt tension: Blacklyte chairs use a frog-type tilt mechanism with adjustable tilt tension. Find the tension knob under the front of the seat and turn it clockwise to increase resistance, counterclockwise to reduce it — set it so rocking feels controlled but not locked.
- Headrest: Position the headrest pillow to contact the base of your skull when you're in your natural seated posture. If it pushes your head forward, lower it.
For a deeper look at how each of these adjustments connects to long-term posture health, Blacklyte's Ergonomics guide and Gaming Hub cover the science behind extended-session comfort in full detail.
Common Assembly Mistakes (and How to Avoid Them)
Even experienced assemblers make these errors. Knowing them in advance takes the sting out entirely.
- Installing the tilt mechanism backwards: Always confirm the FRONT marker before bolting. A backwards tilt plate makes the chair feel as though it wants to pitch you forward — it's uncomfortable and structurally incorrect.
- Tightening bolts one at a time to full torque: This causes components to skew slightly before all fasteners are engaged. Always hand-thread every bolt first, then tighten progressively in a cross pattern.
- Swapping left and right armrests: The L and R markings exist for a reason. On 4D armrests, a swapped install will mean the pivot and width-adjust directions are mirrored, which feels awkward immediately. Check the labels every time.
- Over-tightening screws: Premium chairs use threaded metal inserts, but applying excessive torque — particularly on the seat bolts — can strip threads or crack plastic housings. Firm and secure is sufficient; you shouldn't need to grunt.
- Forgetting to remove the plastic shipping cap on the gas piston: This transparent cap protects the piston during shipping. If your height adjuster doesn't function after assembly, this is almost certainly why — remove the cap and retry.
- Skipping the post-assembly torque check: After your first 30 minutes of use, sit out and check every visible bolt. Vibration and initial movement can loosen connections that felt tight during assembly.
Frequently Asked Questions
How long does it take to assemble a gaming chair?
For most people, the full assembly process — from unboxing to first sit — takes between 20 and 45 minutes. If it's your first time, budget 45 minutes and don't rush. Having a second person available for the backrest step can cut that time noticeably.
Do I need to buy extra tools?
No. Every Blacklyte gaming chair ships with the Allen wrenches needed for assembly. A Phillips-head screwdriver can occasionally be useful for trim pieces, but it's rarely required. The included tools are purpose-sized for the hardware in the box.
Can I assemble the chair by myself?
Yes — every step in this guide can be completed solo. The backrest attachment is the only step that's meaningfully easier with help. If you're building alone, use the shipping box as a prop to hold the backrest at the correct angle while you align the bolts.
The height lever isn't working. What's wrong?
In almost every case, this means the plastic shipping cap was left on the hydraulic gas piston. Remove the transparent cap from the top of the piston and sit in the chair to fully press the seat onto it, then test the lever again.
Can I disassemble and move the chair later?
Yes. Gaming chairs are designed to be fully disassembled. Reverse the build steps: detach pillows, remove armrests, unbolt the backrest, lift the seat off the base, and pull the base from the gas piston. Store components flat and keep the hardware bag with the chair. Blacklyte's 30-day returns policy and up-to-5-year extended warranty on chairs mean you have robust protection throughout the life of your purchase.
Which Blacklyte chair should I choose?
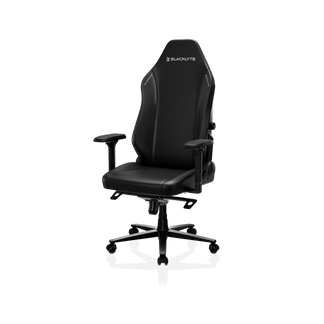
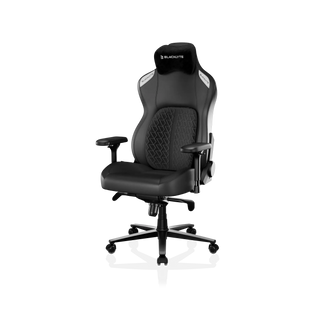
The right chair depends on your body, your usage pattern, and what ergonomic features matter most to you. The Kraken Pro is a premium pick with an aluminum alloy base and a built-in floating lumbar. The Athena Pro is Blacklyte's flagship — featuring a memory foam over contour-foam seat, a 4-way adjustable built-in lumbar, and the most comprehensive ergonomic adjustment range in the lineup. The Athena is a well-built entry-level option with an aluminum alloy base and external lumbar pillow. Use Blacklyte's chair comparison tool to put the specs side by side.
The Build Is Half the Battle
A well-assembled gaming chair is one you don't think about — it just supports you. The build itself is straightforward when you work methodically: prepare the space, lay out the parts, check the tilt mechanism orientation, tighten bolts in sequence, and don't rush the backrest connection. Follow those fundamentals and you'll have a solid, rattle-free chair on the first attempt.
The real payoff, though, comes from the five minutes you spend dialing in the ergonomics afterward. Seat height, lumbar position, armrest angles, and tilt tension are what separate a chair you sit in from a chair that genuinely supports your posture over a four-hour session. Take those adjustments seriously — your lower back will notice the difference long before your framerate does. If you're still in the research phase and haven't picked your chair yet, explore the full Blacklyte gaming chair range or use the comparison tool to find the right fit for your build and budget.
Ready to Build Your Setup?
Browse Blacklyte's full lineup of ergonomic gaming chairs — from the entry-level Athena to the flagship Athena Pro — or explore the full Blacklyte collection including standing desks and accessories. Questions before you buy? The team is ready to help.
Contact Us Shop Gaming Chairs


