




Chairs
Signature Chairs
View All

Kraken Pro Chairs
Tailored to every body, delivering posture perfect support.
Learn More
Buy

Athena Pro Chairs
Typical choice with perfect blend of stylish aesthetics.
Learn More
Buy

Collab Chairs
Engineered for pro comfort, designed with iconic style.
Learn More
Compare Chairs
Chairs Add-ons

Leather Cleaner 250ml

Leather Conditioner 250ml

Soft Glide PU Casters (Set of 5)
Desks
Signature Desks
View All
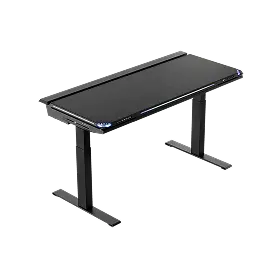
Atlas Desk
All the core features, for less
Learn More
Buy
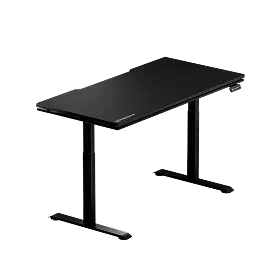
Atlas Lite Desk
Adjustable height to personalize your setup
Learn More
Buy
Compare Desks
Desks Add-ons

Atlas Glass Mouse Pad

Atlas Dual Monitor Arm

Atlas Monitor Arm

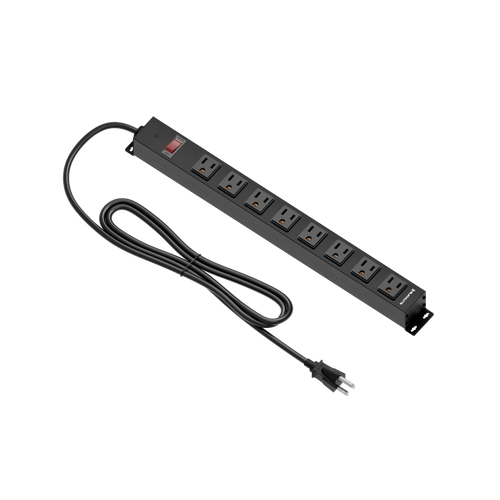
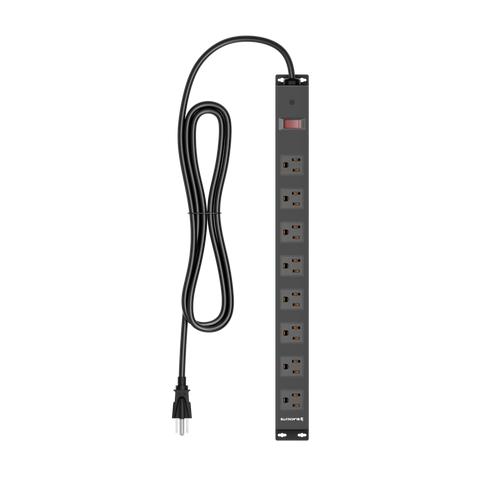
Raiden PDU Power Strip

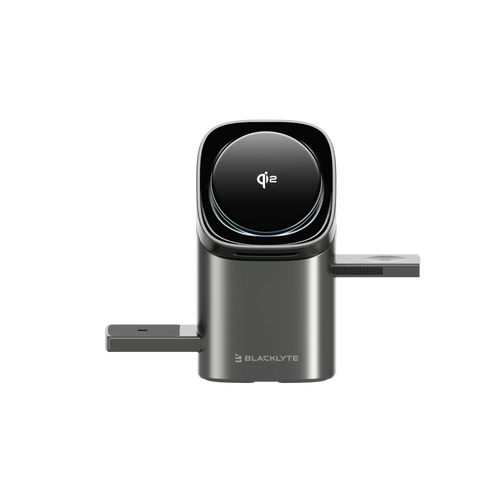
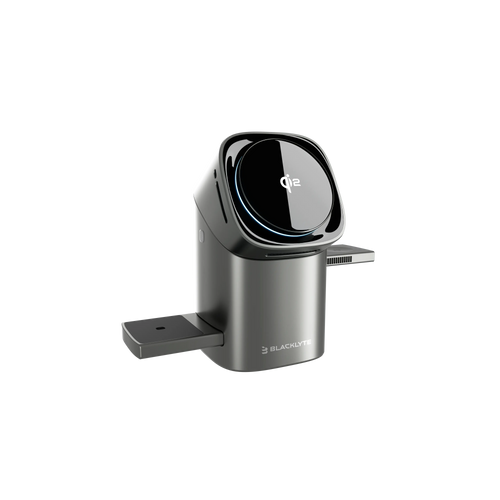
Raiden Full Touch Wireless Charger
LIGHTING
Accessories
Chairs Add-ons
Leather Cleaner 250ml
Leather Conditioner 250ml
Soft Glide PU Casters (Set of 5)
Desks Add-ons
Atlas Glass Mouse Pad
Atlas Dual Monitor Arm
Atlas Monitor Arm
Raiden PDU Power Strip
Raiden Full Touch Wireless Charger
New Arrival

Atlas Dual Monitor Arm
Buy

Atlas Dual Monitor Arm
Buy

Raiden PDU Power Strip
Buy

Raiden Full Touch Wireless Charger
Buy

Athena Pro Gaming Chair
Buy

Athena Pro Gaming Chair
Buy

Athena Pro Gaming Chair
Buy

Atlas Monitor Arm
Buy

Atlas Monitor Arm
Buy

Leather Cleaner 250ml
Buy

Leather Conditioner 250ml
Buy

Lockable Blade Casters (Set of 5)
Buy

Luminous Rollerblade Casters (Set of 5)
Buy

Soft Glide PU Casters (Set of 5)
Buy
Support
Discover
Activities


Blacklyte Gaming Chair Comparison: Find Your Perfect Fit
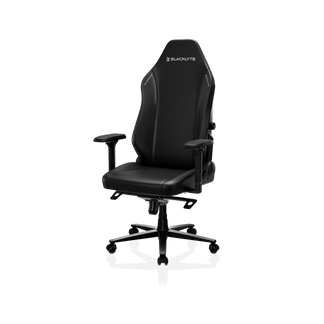
Athena Pro
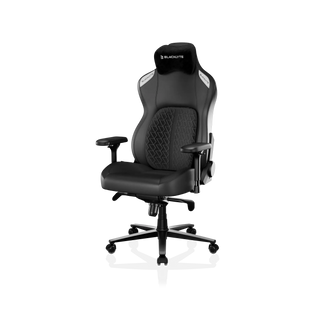
Kraken Pro
Flagship chair with upgraded cushioning & built-in lumbar support
Premium chair with advanced ergonomics & dynamic floating lumbar support
From
$499
From
$539
$649
Key Features
Head Pillow
Dual Magnetic Head Pillow
Magnetic Curved Head Pillow
Lumbar Support
4-Way Built-in Lumbar Support
Dynamic Floating Lumbar Support
Seat Cushion Foam
Upgraded Dual-layer Memory Foam
High-density Memory Foam
Firmness
Medium-firm with a Dual-layer Soft Cushion Top
Medium-firm
Armrest
Standard 4D Armrests
Standard 4D Armrests
Options
Upholstery Options
Blacklyte FlexKnit™ Fabric
Blacklyte DuraGen™ Leatherette
Blacklyte DuraGen™ Leatherette
Fit
Regular
One size fits most
Regular
One size fits most
Colors
Leatherette: Black, Blue, Wine Red
Fabric: Black, Chalk, Camo
Leatherette: Black
Specifications
Wheelbase
Aluminum Alloy
Aluminum Alloy
Reclining Angle
90°~149°
90°~149°
Rocking Mode
0°~14°
0°~14°
Hydraulic Gas Piston
Class 4
KGS Gas Lift
Class 4
KGS Gas Lift
Tilt Mechanism
Frog Mechanism
Frog Mechanism
Casters
50mm PU Casters
60mm PU Casters
Warranty
Up to 5 Years
Up to 5 Years
Flagship chair with upgraded cushioning & built-in lumbar support
Premium chair with advanced ergonomics & dynamic floating lumbar support
From
$499
From
$539
$649
Collapesd view
Show differences only
Key Features
Head Pillow
Dual Magnetic Head Pillow
Magnetic Curved Head Pillow
Lumbar Support
4-Way Built-in Lumbar Support
Dynamic Floating Lumbar Support
Seat Cushion Foam
Upgraded Dual-layer Memory Foam
High-density Memory Foam
Firmness
Medium-firm with a Dual-layer Soft Cushion Top
Medium-firm
Armrest
Standard 4D Armrests
Standard 4D Armrests
Options
Upholstery Options
Blacklyte FlexKnit™ Fabric
Blacklyte DuraGen™ Leatherette
Blacklyte DuraGen™ Leatherette
Fit
Regular
One size fits most
Regular
One size fits most
Colors
Leatherette: Black, Blue, Wine Red
Fabric: Black, Chalk, Camo
Leatherette: Black
Specifications
Wheelbase
Aluminum Alloy
Aluminum Alloy
Reclining Angle
90°~149°
90°~149°
Rocking Mode
0°~14°
0°~14°
Hydraulic Gas Piston
Class 4
KGS Gas Lift
Class 4
KGS Gas Lift
Tilt Mechanism
Frog Mechanism
Frog Mechanism
Casters
50mm PU Casters
60mm PU Casters
Warranty
Up to 5 Years
Up to 5 Years
Which desk is right for you?

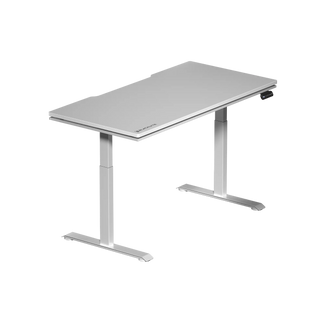
Atlas Desk
Atlas Lite Standing Desk
Our first-generation height-adjustable desk with dynamic lighting synced to your setup
Our next-generation height-adjustable desk available in four sizes and three colors
From
$1,049
$1,299
From
$599
$699
Collapesd view
Show differences only
Key Features
Integrated Power Supply Column
Integrated Cable Management Tray
Magnetic Surface
100%
Modular Desk Add-Ons Compatibility
Compatible
Partially Compatible
Height Range
28.3″-53.9″(720mm-1370mm )
27.6″-46.1″(700mm-1170mm )
Dynamic Lighting
Integrated LED Lighting
Height Memory Presets
2
4
Availability
Size
Large
59.1″ × 27.6″( 1500mm × 700mm )
Small47.2″ × 31.5″( 1200mm × 800mm )
Medium55.1″ × 31.5″(1400mm × 800mm )
Large63.0″ × 31.5″(1600mm × 800mm )
Extra Large70.9″ × 31.5″(1800mm × 800mm )
Colors
Obsidian Black
Obsidian Black, Moonstone White, Natural Oak
Specifications
Desk Top Construction
(Outer) PVC Wrap (Inner) MDF with Steel
(Outer) Melamine Laminate (Inner) MDF
Motors
Dual Electric Motors
Dual Electric Motors
Leg Columns
3-Stage Legs
2-Stage Legs
Anti-Collision System
Enhanced Stability
Power Switch
Motor Speed (Vertical Lift)
1.5″/s(38mm/s)
1”/s(25mm/s)
Noise Level
<48 dB
≤48 dB
Maximum Distributed Load Capacity
275.6lbs(125kg)
S / M: 220lbs(100kg)L / XL: 265lbs(120kg)
Input Voltage
100-240V
100–240V
Certifications
Warranty
Up to 5 Years
Up to 5 Years
Our first-generation height-adjustable desk with dynamic lighting synced to your setup
Our next-generation height-adjustable desk available in four sizes and three colors
From
$1,049
$1,299
From
$599
$699
Collapesd view
Show differences only
Key Features
Integrated Power Supply Column
Integrated Cable Management Tray
Magnetic Surface
100%
Modular Desk Add-Ons Compatibility
Compatible
Partially Compatible
Height Range
28.3″-53.9″(720mm-1370mm )
27.6″-46.1″(700mm-1170mm )
Dynamic Lighting
Integrated LED Lighting
Height Memory Presets
2
4
Availability
Size
Large
59.1″ × 27.6″( 1500mm × 700mm )
Small47.2″ × 31.5″( 1200mm × 800mm )
Medium55.1″ × 31.5″(1400mm × 800mm )
Large63.0″ × 31.5″(1600mm × 800mm )
Extra Large70.9″ × 31.5″(1800mm × 800mm )
Colors
Obsidian Black
Obsidian Black, Moonstone White, Natural Oak
Specifications
Desk Top Construction
(Outer) PVC Wrap (Inner) MDF with Steel
(Outer) Melamine Laminate (Inner) MDF
Motors
Dual Electric Motors
Dual Electric Motors
Leg Columns
3-Stage Legs
2-Stage Legs
Anti-Collision System
Enhanced Stability
Power Switch
Motor Speed (Vertical Lift)
1.5″/s(38mm/s)
1”/s(25mm/s)
Noise Level
<48 dB
≤48 dB
Maximum Distributed Load Capacity
275.6lbs(125kg)
S / M: 220lbs(100kg)L / XL: 265lbs(120kg)
Input Voltage
100-240V
100–240V
Certifications
Warranty
Up to 5 Years
Up to 5 Years

BLACKLYTE PRODUCT INSTALLATION GUIDES
Welcome to the Blacklyte Installation Guide. Here you’ll find everything you need to set up your gear quickly and correctly. With clear step-by-step instructions and video tutorials for Blacklyte gaming chairs and desks, getting your setup ready has never been easier.

Pre-Assembly Quick Reference
Before opening your hardware kit, ensure your space is clear and review the primary requirements for each build. Carefully read the attached user manual before beginning assembly.
| Product Model | Recommended Builders | Core Tools Included | Estimated Build Time |
|---|---|---|---|
| Kraken & Athena Series Gaming Chair | 1 - 2 People | T-Handle & L-Handle Wrenches | 15 - 20 Minutes |
| Atlas & Atlas Lite Standing Desk | 2 People (For flipping) | Wrench Tools | 20 - 30 Minutes |
Blacklyte Kraken Pro Gaming Chair
Assembly Instructions
Follow this layout sequence to assemble your Kraken Pro ergonomic seating.

Follow the assembly video above for a guided installation, or download the official Kraken Pro User Manual for detailed written instructions, exploded diagrams, and troubleshooting tips.
Pro-Tip: Assemble the chair on a soft surface, like a rug or the cardboard shipping box, to avoid scratching the premium leather.
01 Wheelbase Assembly
Attach Casters: Push the five casters firmly into the slots of the aluminum alloy wheelbase.
Insert Gas Lift: Flip the wheelbase, insert the Class 4 gas lift, and then slip the three-stage sleeve over the top.
02 Backrest Assembly
Align Backrest: Set the seat base on the floor, and guide the backrest between the two upright metal brackets attached to the seat base.
Insert Backrest: Insert the backrest onto the rails, secure the backrest with the included screws and Allen wrench.
03 Seat Mechanism Attachment
Secure Frog Mechanism: Flip the seat base, secure the frog mechanism onto the seat base with four included screws.
Mount Armrests: Secure the 4D detachable magnetic armrests to the bottom of the seat base. Note: Ensure the glossy adjustment button faces toward the front side of the seat.
Install Lumbar Lever: Fasten the lumbar support adjustment lever using the included Phillips screws.
04 Magnetic Finishing Touches
Snap Side Covers: Install the magnetic covers on both sides by simply snapping them onto the rails.
Place Pillow: Attach the magnetic memory foam head & neck pillow to finish your build.
Looking for a more comfortable seating experience after assembly? Check out our guide on
How to Properly Adjust a Gaming Chair for All-Day Comfort
.
Blacklyte Athena Series Gaming Chair
Assembly Instructions
Follow this layout sequence to assemble your Athena Series ergonomic seating.
Follow the assembly video above for a guided installation, or download the official Athena Series User Manual for detailed written instructions, exploded diagrams, and troubleshooting tips.
Preparation: Check the parts list in the assembly guide to verify you have all necessary parts before beginning.
01 Wheelbase Assembly
Attach Casters: Insert the five casters into the wheelbase.
Insert Gas lift: Flip the wheelbase and insert the gas lift, followed by its protective cover.
02 Seat Base Assembly
Secure Frog Mechanism: Align and secure the frog mechanism onto the seat base using the four included screws.
Insert Handles: Insert the two adjustment handles into the sides of the mechanism.
Attach the Base: Attach the seat base onto the previously assembled wheelbase.
03 Backrest Installation
Remove Pre-installed Screws: Take out the four pre-installed screws with the included Allen wrench.
Insert Backrest: Insert the backrest onto the rails of the seat base, secure the backrest with the included screws and Allen wrench.
04 Magnetic Finishing Touches
Snap Side Covers: Install the magnetic covers by simply snapping them onto the metal rails on both sides.
Place Pillow: Attach the magnetic memory foam head & neck pillow to finish your build.
Looking for a more comfortable seating experience after assembly? Check out our guide on
How to Properly Adjust a Gaming Chair for All-Day Comfort
.
Blacklyte Atlas Gaming Desk
Installation Guide
Setting up your motorized height-adjustable workstation requires careful step sequence management.
Follow the assembly video above for a guided installation, or download the official Atlas Gaming Desk User Manual for detailed written instructions, exploded diagrams, and troubleshooting tips.
Important: Due to the heavy distributed load capacity and solid steel-reinforced MDF frame, two people are required to safely lift and flip this desk setup.
01 Desktop Base & Cable Tray Assembly
Position Desktop: Place the premium desktop surface face down on a clean, flat floor, using the protective packaging foam underneath if desired.
Install Cable Tray Cover: Secure the cable tray cover to the desktop using the included Allen wrench and six screws.
02 Motorized Leg & Control Unit Installation
Remove Control Unit Cover: Remove the eight screws securing the control unit cover to access the control unit and cable connections.
Install Motorized Legs: Insert the motorized legs into the desk frame and connect the corresponding cables.
Reinstall Control Unit Cover: Once all cable connections are complete, reinstall and secure the control unit cover.
03 Cable Tray & Leg Base Assembly
Secure Cable Tray: Attach the cable tray to the desk frame using the included screws and Allen wrench.
Install Leg Bases: Place the leg bases onto the motorized columns and secure each leg base with four screws.
04 Desk Finalization
Two-Person Flip: With one person positioned on each side of the desk, firmly grasp the leg bases and carefully flip the desk assembly upright onto its feet in one smooth motion.
Install LED Light Strips: Slide the two LED light strips into their designated slots to complete the installation.
Ready to complete your dream desk layout? Explore our collection of premium
Desk Accessories
to add single and dual monitor arms and desk glass mouse pads.
Blacklyte Atlas Lite Standing Desk
Installation Guide
The Atlas Lite follows the same motorized desk assembly sequence as the Atlas Gaming Desk
Follow the assembly video above for a guided installation, or download the official Atlas Lite Standing Desk User Manual for detailed written instructions, exploded diagrams, and troubleshooting tips.
Important: Read the manual, verify all parts from the two boxes, and optionally use the foam layer from box one to protect your floor. Two people are highly recommended to safely assemble, lift, and flip this desk setup.
01 Leg Frame & Base Assembly
Install Cross Beams: Place one of the two cross beams on top of the desk legs, ensuring the arrows point upward, and secure it with four M6 screws. Flip the legs over and repeat this procedure for the second cross beam.
Attach Stabilizers: Position the assembled leg unit and install the two stabilizers using two M6 screws on each side.
Secure Feet: Flip the leg unit upside down. Place the feet on top of the leg columns and secure them with four M6 screws on each side, then set the assembled unit aside.
02 Desktop & Control Unit Integration
Position Desktop: Place the desktop surface face down on the floor (using the protective foam layer if desired).
Mount Leg Unit: Set the previously assembled feet/leg unit on top of the resting desktop. Secure the unit using three M6 screws on each side and two additional M6 screws in the middle.
Mount Controller: Decide whether you prefer your desk control unit on the left or right side, then secure it firmly into place using two Phillips screws.
03 Structured Cable Management
Run Leg Extension: Use the included extension cord to safely connect the motorized leg that is furthest from your installed control unit.
First Cable Tray: Secure the first cable tray with four M6 screws. Cleanly route the leg cords so they pass through the designated pass-through hole directly to the control unit.
Secondary Cable Tray: Position and install the secondary cable tray using four Phillips screws, then plug the power adapter straight into the control unit.
04 Desk Finalization
Two-Person Flip: With one person positioned on each side of the desk, firmly grasp the assembly and carefully flip the desk upright onto its feet in one smooth motion.
Ready to complete your dream desk layout? Explore our collection of premium
Desk Accessories
to add single and dual monitor arms and desk glass mouse pads.
Frequently Asked Questions
1. Where can I download the digital PDF user manuals?
If you prefer written reference blueprints, you can access all high-resolution digital manuals and layout diagrams directly on our Blacklyte Resources Hub.
2. Do I need any special tools to build my Blacklyte chair or desk?
No. Every item ships complete with a custom hardware pack containing all necessary structural screws, custom L-handle wrenches, and precise T-handle alignment tools. No household power drills are needed.
3. What should I do if my motorized desk display throws an error code?
Ensure all motor leg cords are plugged all the way into the control module underneath the desk tray. Unplug the main power supply from the wall for 30 seconds, plug it back in, and press and hold the "Down" arrow button to initiate a system calibration reset.
4. How do I maintain my gaming desk setup clean and functional over time?
Keep your moving tracks clear of dust and clean the surfaces regularly. Read our step-by-step breakdown on How to Fix an Uncomfortable Gaming Setup to balance your physical alignment perfectly with your new motorized layout.
- Choosing a selection results in a full page refresh.