










A monitor arm is one of the single best investments you can make for your gaming setup or workstation. It reclaims desk space, puts your screen exactly where your posture demands it, and eliminates the rigid limitations of a stock monitor stand. But here is the part most guides skip over: the arm itself is only as capable as the mount holding it to your desk. Choose the wrong mounting method for your surface and you risk wobble, desk damage, or a screen that refuses to stay where you put it.
There are two standard approaches — clamp mounting and grommet mounting — and neither is universally better than the other. The right choice depends on your desk material, your surface thickness, how permanent you want the installation to be, and what the finished setup needs to look like. This guide walks you through exactly how each method works, when to use each one, how to check VESA compatibility before you start, and how to execute a clean, confident installation from first step to final cable tuck.
Why Your Mounting Method Matters More Than You Think
Most people spend significant time picking the right monitor arm — checking the weight capacity, the reach, the gas spring rating — and almost no time thinking about how it attaches to the desk. That is a mistake with real consequences. A premium arm installed on the wrong mount type can dig into a desktop surface, create micro-vibration that shakes your screen during every keystroke, or fail over time as the mount loses grip on the wrong material. The mount is the foundation; everything else sits on top of it.
There is also an aesthetic dimension that matters more as setups become more intentional. A clamp left visible along the front edge of a clean battlestation reads differently than a grommet installation that hides all hardware below the surface. For anyone building a high-performance workstation or gaming desk where every detail is deliberate, that distinction is worth making consciously rather than defaulting to whatever came in the box. Explore Blacklyte's full range of desk accessories to see how each element of your setup can work together seamlessly.
How Clamp Mounting Works
A clamp mount (commonly called a C-clamp) grips the edge of your desk from both above and below. The top plate sits flush on your desktop surface, a lower jaw extends beneath it, and a bolt or hand knob cinches the two together against the desk edge. The monitor arm's vertical post slots directly into this clamp assembly, and the whole setup can be installed — or removed — in a matter of minutes without any permanent modification to your desk.
The defining advantage of a clamp mount is reversibility. Tighten it on today, move it tomorrow, and your desk shows no trace of the installation. That flexibility makes it the right default for a wide range of situations: renters who cannot modify a desk, users who are still dialing in monitor placement, or anyone running a setup that gets rearranged seasonally. The installation requires no tools beyond what comes in the box and no pre-existing holes in the surface.
The key constraint is the desk edge itself. For a clamp to get a secure, flat grip, your desk needs a square, accessible edge — typically between 10 mm and 50 mm thick depending on the arm's specifications — with enough clearance underneath for the lower jaw to seat properly. Desks with beveled or rounded edges, those with a structural rail running along the underside, or surfaces pushed flush against a wall with no rear lip can all prevent a clamp from working correctly.
Best Use Cases for Clamp Mounts
- Renters or shared office spaces where permanent desk modifications are not permitted
- Standard rectangular desks with a flat, accessible rear or side edge
- Setups where the monitor position may need to shift as the workspace evolves
- Quick installations where getting up and running fast is the priority, especially for users with a single monitor arm setup
- Solid wood, high-quality laminate, or metal desktop surfaces
How Grommet Mounting Works
A grommet mount — sometimes called a bolt-through mount — secures the arm by passing a threaded bolt down through a hole in the desktop. A washer or metal backing plate is tightened from underneath, sandwiching the surface between the top assembly and the plate below. This creates an anchor point that distributes force across a wider area of the desktop rather than concentrating it at the edge, and the resulting connection is typically the most rigid option available for a desk-mounted arm.
The hole can come from two sources: a pre-existing cable management cutout (many desks ship with 50–80 mm grommets that double perfectly as mounting points) or one you drill yourself. If drilling, check your arm's specifications for the required hole diameter before committing — the required opening varies significantly between manufacturers and models, and getting it wrong means either starting over or using an adapter. Once installed, all hardware sits below the surface, leaving the desktop clean and uninterrupted from above.
The trade-off is permanence. A grommet mount is not a quick-change setup — once the hole is drilled, it is there. That makes it the right choice for anyone building a fixed, long-term workstation where the priority is maximum stability and a refined, integrated appearance. Multi-monitor rigs and ultrawide panels that add significant weight to the arm also benefit from the more rigid anchor a grommet provides at higher weights and extended reach distances. This makes grommet mounting especially suitable for a dual monitor arm setup, where stability becomes increasingly important when supporting two displays.
Best Use Cases for Grommet Mounts
- Permanent home office or gaming setups where the desk configuration is fixed
- Desks with pre-existing cable management holes that can double as mounting points
- Ultrawide displays or dual monitor arm setups requiring maximum rigidity under load
- Design-forward workstations where no visible hardware is a priority
- Desks with edges that are incompatible with clamping (beveled, rounded, or wall-flush)
Clamp vs. Grommet: Side-by-Side Comparison
Neither mount type is objectively superior — both can deliver a stable, professional result on the right desk. The table below summarizes the practical differences so you can match the method to your specific situation at a glance.
| Factor | Clamp Mount | Grommet Mount |
|---|---|---|
| Installation | Non-permanent; attaches in minutes, no drilling required | Requires a desk hole; more involved but straightforward |
| Stability | Good to excellent on solid, correctly-sized surfaces | Excellent; load distributes through the desktop, not the edge |
| Desk Compatibility | Requires flat, square edge within the arm's thickness range | Works on almost any surface with a suitable hole or drilling point |
| Aesthetics | Visible clamp hardware at the desk edge | Clean, flush appearance with hardware hidden below |
| Placement Flexibility | Limited to the edge of the desk | Can be positioned anywhere a hole exists or can be drilled |
| Reversibility | Fully reversible; no marks left on the desk | Permanent hole; not easily undone |
| Best For | Single monitor setups, renters, flexible setups, quick installs | Fixed workstations, ultrawide/multi-monitor rigs, clean aesthetics |
Matching Your Mount to Your Desk Material
The single biggest installation mistake people make is choosing a mount type without accounting for what their desk is actually made of. The material determines how load is distributed, how much compression the surface can take, and which method gives you a secure anchor without long-term damage. Here is how each common surface type maps to the two mounting options.
Solid Wood, Butcher Block, and Quality Laminate
These are the most forgiving surfaces. Both clamp and grommet mounts perform well here, and either is a sound choice. Clamps work best when the edge thickness falls within the arm's specified range — typically 10–40 mm for most consumer arms. If your desk has a thicker or thinner edge than that window allows, a grommet is the more reliable path. For grommet installations on these surfaces, standard drilling is straightforward and the material holds the anchor well.
Particleboard and MDF Desktops
These materials are common in budget and mid-range furniture and require extra care regardless of which mount type you use. With a clamp, the concentrated pressure of the lower jaw against the underside edge can compress and crush particleboard over time, especially if the arm is over-tightened. If you use a clamp on this material, place a wide metal spreader plate between the clamp jaw and the desk underside to distribute the pressure — and stop tightening the moment the mount stops wobbling. More is not better here.
For grommet mounts on particleboard or MDF, use the largest backing plate available — larger than the one that typically ships with the arm — to spread the clamping force over a wide area. This prevents the bolt from gradually pulling through the softer core material over time. A grommet installation done correctly is actually the more durable long-term solution on these surfaces when the right hardware is used.
Tempered Glass Desktops
Standard C-clamps should never be used directly on a tempered glass desktop. The focused edge pressure creates a localized stress point that glass cannot absorb the way wood or laminate can — the risk of shattering is real and the consequences are significant. For glass surfaces, a grommet mount using large rubber or nylon washers plus substantial metal backing plates on both the top and bottom surfaces is the correct approach. Always verify that the monitor arm you are purchasing is explicitly rated for glass workstation use before proceeding.
Desks with Beveled Edges or No Rear Clearance
If your desk has a rounded or beveled front edge, a clamp cannot achieve the flat contact it needs to grip securely. The same applies to desks positioned flush against a wall with no usable rear lip, or those with a structural rail running along the underside that blocks the lower jaw from seating. In any of these scenarios, a grommet mount is your only viable option. Drill the hole precisely where you want the arm positioned rather than being constrained to the edge.
Before You Install: The VESA Compatibility Check
Before you commit to any mounting method, there is a prerequisite check that has nothing to do with the desk at all — verifying that your monitor is compatible with the arm you plan to use. The VESA standard defines the pattern of four mounting holes on the back of a display. Most monitors use either a 75×75 mm or 100×100 mm pattern, with the measurement referring to the center-to-center distance between the holes in both directions. Larger and heavier displays sometimes use 200×100 mm or 200×200 mm patterns.
To check your monitor, look at the back panel for a square arrangement of four screw holes — often located in a central recessed area that becomes visible once you remove the stock stand. Measure the distance between hole centers horizontally and vertically. That measurement is your VESA pattern. Cross-reference it against the arm's stated compatibility before purchasing. If the patterns do not match, adapter plates exist that bridge the gap between common sizes, but note that an adapter adds weight to the arm's load — factor in both the monitor weight and the adapter weight when checking the arm's maximum capacity rating.
Also confirm the monitor's weight without its stand against the arm's weight rating. It is good practice to choose an arm rated for at least 10–20% more than your monitor's actual weight, which provides a safety buffer and prevents gradual spring sag in gas-spring arms over time. Getting this check done before installation saves you from a return and a re-install.
Step-by-Step: How to Install a Clamp Mount
A clean clamp installation takes under fifteen minutes. The steps below assume a standard single-monitor arm with a C-clamp base and a gas-spring mechanism — the most common configuration for gaming and home office use.
What You'll Need:
- Monitor arm with clamp base and all included hardware
- Allen key or hex wrench (usually included with the arm)
- Soft cloth or rubber pad (to protect the desk surface)
- Tape measure
- Measure and mark your position — Decide where along the desk edge you want the arm centered. Use a tape measure to confirm the edge thickness at that point falls within the clamp's rated range. Check underneath for obstructions like cable trays, drawer runners, or support rails that could block the lower jaw.
- Position the clamp assembly — Place the clamp top plate on the desk surface at your chosen position. Slide the lower jaw up against the underside of the desk edge. The soft pad (usually rubber-backed from the factory) should sit between the clamp and the desk surface on both sides to prevent cosmetic marks.
- Hand-tighten the clamp bolt — Tighten the securing bolt or hand knob progressively until the clamp no longer moves when pushed. For particleboard or softer surfaces, stop here — do not apply additional torque. For solid wood or metal surfaces, apply a firm snug tighten with the Allen key but stop well before the point of resistance. Over-tightening is the most common installation error.
- Attach the arm post — Slide the vertical post of the arm into the clamp collar and secure it per the manufacturer's instructions. Most arms use a set screw at the base of the post that locks rotational position.
- Mount the VESA bracket to the monitor — Remove the monitor's original stand. Align the VESA mounting plate from the arm with the screw holes on the monitor's back panel, and secure with the provided M4 screws. Do not overtighten — the screws should be snug but the monitor should not flex.
- Attach the monitor to the arm — Hook or lock the monitor bracket into the arm head per the manufacturer's mechanism. Adjust the gas spring tension so the screen holds its position without drifting up or down under its own weight.
- Route your cables — Run display and power cables through the arm's built-in cable management channels. Leave a small service loop of slack at the base before the cable exits the desk side — this prevents strain at the connection points during repositioning.
- Set your ergonomic position — Adjust height, tilt, and swivel so the top of the screen sits at or just below eye level when you are seated in your normal working posture. For ergonomic workstation guidance, Blacklyte's ergonomics resource covers full desk and monitor positioning in detail.
Step-by-Step: How to Install a Grommet Mount
A grommet installation takes slightly longer than a clamp but delivers a cleaner result. If your desk already has a cable management grommet hole in the right position, the process is simple. If you need to drill, allow extra time and work carefully — patience here pays dividends in the finished look.
What You'll Need:
- Monitor arm with grommet base hardware (bolt, top plate, backing plate, nut, washers)
- Adjustable wrench or socket set
- Allen key or hex wrench
- Drill and appropriate bit (if drilling a new hole)
- Masking tape and pencil (for marking the drill point)
- Rubber or nylon washers (critical for glass surfaces)
- Identify or plan your hole location — Check your desk for an existing cable management hole. If one exists and is in the right position, use it. If not, mark your desired position with a pencil and use masking tape over the mark to prevent surface chipping during drilling. Check the arm's specification sheet for the required hole diameter before drilling — this varies by model.
- Drill the hole (if required) — For wood or laminate surfaces, use a sharp spade or hole-saw bit at the correct diameter. Keep the drill level and use moderate, consistent pressure. For tempered glass, do not attempt to drill yourself — glass requires specialized diamond-core bits and professional technique to avoid shattering.
- Clean the hole edges — Remove any debris or splinters from the hole edge. For wood surfaces, a light sand of the hole perimeter prevents future splintering around the mount base.
- Thread the bolt through — Pass the arm's mounting bolt down through the hole from the top. Place the top plate (and any rubber gaskets included) on the desk surface around the hole before threading if required by your arm's design.
- Secure the backing plate underneath — From beneath the desk, slide the backing plate onto the bolt, followed by the washer and nut. Hand-tighten the nut until the assembly is snug. For particleboard or MDF, use the largest backing plate available to spread the load.
- Final tighten with a wrench — Use an adjustable wrench to tighten the nut firmly. The assembly should have no play or rocking. Do not over-torque on softer materials.
- Attach the arm post and monitor — Follow the same process as steps 4–6 in the clamp installation above: slide the arm post into the base collar, mount the VESA plate to the monitor, attach the monitor to the arm, and adjust the gas spring tension.
- Route cables through the grommet hole — One of the main advantages of a grommet installation is that the same hole used for mounting can also carry display cables cleanly down through the desk surface. Route cables through the hole alongside the mounting post and manage them underneath for a fully concealed finish. Check Blacklyte's accessories collection for cable management solutions that complement this approach.
Monitor Arms and Standing Desks: What to Know
Pairing a monitor arm with a height-adjustable standing desk is one of the most ergonomically powerful combinations available for a home office or gaming setup. The arm lets you position your screen independently of the desk height, which means you can fine-tune monitor placement at both the seated and standing positions without compromise. Both clamp and grommet mounts work well with sit-stand desks — the arm rides up and down with the desktop as it moves, keeping your monitor at the same relative position throughout the full height range.
The critical issue when pairing a monitor arm with a standing desk is cable management. When the desk moves through its full height range, cables that are routed too tightly will be pulled taut — or pulled from their ports entirely — at the upper end of travel. The solution is a service loop: leave 25–30 cm of extra slack in your display cables and route them loosely along the underside of the desk surface. Before finalizing any cable routing, run the desk through its full range of travel and confirm nothing pulls, binds, or gets pinched. If your standard display cable is too short to accommodate the loop, a longer replacement cable is a small investment worth making before installation.
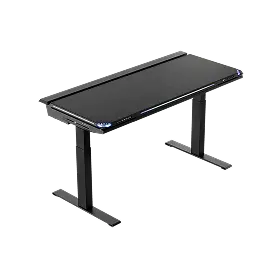
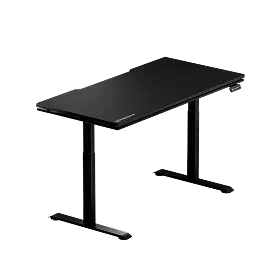
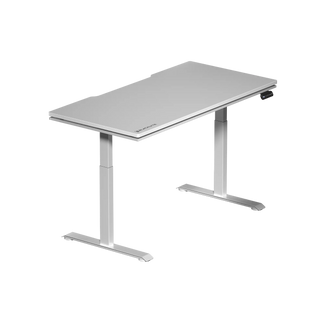
The Blacklyte Atlas Standing Desk and Atlas Lite Standing Desk both include integrated cable management channels designed to work alongside monitor arms and peripheral setups. The desks' integrated power strips and cable routing features significantly reduce the complexity of keeping a sit-stand setup organized through the full height range. For anyone building a serious standing workstation, the desk comparison page outlines the full feature difference between the two models.
One final note for standing desk users: if wobble at standing height is a concern, switching from clamp to grommet will not resolve it. The instability at height almost always originates from the desk's frame or leg stiffness — not from the arm's anchor point. Addressing that requires evaluating the desk structure itself rather than the mount type.
Final Thoughts: Choosing the Right Foundation
There is no single best mounting method — only the right one for your specific desk, your use case, and how permanent you want the result to be. Clamp mounts earn their place as the default choice for most setups: they install quickly, leave no trace, and perform excellently on any standard solid-surface desk with a compatible edge. Grommet mounts are the right answer when you need maximum rigidity for a heavy or multi-monitor configuration, when your desk cannot accept a clamp, or when a completely clean aesthetic is non-negotiable.
The details that matter most before you start are straightforward: measure your desk thickness, inspect the edge profile, check your VESA pattern, and confirm your arm's weight rating against your monitor's actual weight. Getting those four things right before the arm arrives eliminates the most common installation problems entirely. Do the prep, follow the steps, and the result is a screen that sits exactly where your posture needs it — stable, clean, and ready to perform.
For a complete ergonomic workstation, the monitor arm is one piece of a larger system. Pair it with a properly adjusted chair and a height-adjustable desk and the difference in how you feel after a long session — whether gaming or working — is significant. Visit the Blacklyte Gaming Hub and Ergonomics resource for detailed guidance on building a setup that supports your posture and performance across every component.
Ready to Build Your Best Setup?
Whether you're mounting a single screen or building a full multi-monitor battlestation, Blacklyte has the desks, chairs, and accessories engineered to complete the picture. Have questions about desk compatibility, monitor arm pairing, or building the right ergonomic workstation? Our team is here to help.
Contact UsBrowse Standing Desks | Shop Accessories | Explore Gaming Chairs


